The new FREELEXO CAM
Real cordless freedom: Camera instead of wire
Lush green lawn, as far as the eye can see: And without a lot of effort? The FREELEXO CAM robot mower makes it possible! Using advanced camera technology, the robot mower automatically detects the lawn areas to be mowed. Mowing the lawn has never been so easy – even the tedious placing of the boundary wire is a thing of the past!
The integrated camera of the FREELEXO CAM automatically detects visible edges and different surfaces such as edging stones, bark mulch, gravel, paving slabs and tarmac. Additionally, special sensors ensure that the robot mower does not collide with obstacles such as trees, hedges and walls. Thanks to this intelligent combination of sensors and camera technology, the robot lawnmower mows only the green lawn - without it having to be "defined" beforehand using boundary wires.
Naturally, the mower is also part of the Power X-Change family. So you can also use the same battery in any other Einhell cordless tool and, for example, get your garden in shape with a lawn trimmer, hedge trimmer and more, all without cables!
Get started with our FREELEXO CAM robot mower! What are you waiting for?
The FREELEXO CAM in detail
Overview of the most important functions

Choose your FREELEXO CAM
Our models at a glance
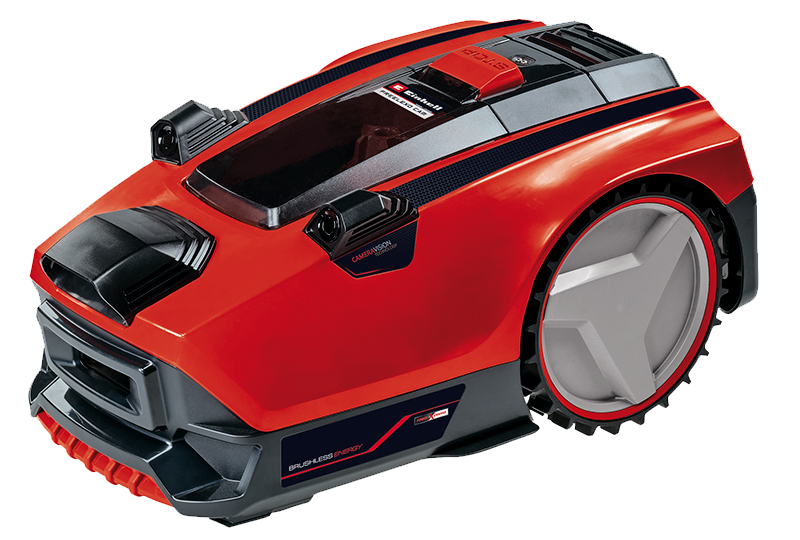
The Einhell FREELEXO CAM 500 will ensure your lawn is always well-groomed – fully automatically. Thanks to its camera technology, it doesn't need any boundary wires. As a member of the Power X-Change family, its battery can be exchanged at any time and used in any other Power X-Change device.
• The robot detects the mowing area by means of a camera and ultrasonic sensors
• Brushless motor – more power and longer running time
• Programmable mowing times
• Enhanced safety with impact, tilt and lift sensors
• Lawns up to 500 m²
• Integrated rain sensor
• Handles gradients of up to 25%
• Cutting height adjustment: 20–60 mm
• Includes magnetic tape for marking temporary boundaries in the garden
• Comes with 1x 3.0 Ah Power X-Change battery and charging station
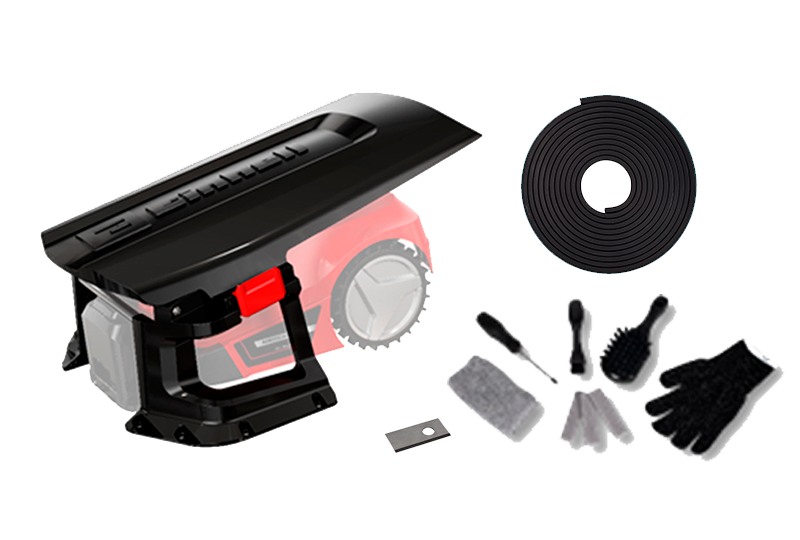
Do you already own a robot mower or have decided to buy one? Then you might also be interested in our robot mower accessories!
We have the perfect accessories for every model:
– Magnetic tape
– Garage
– Spare blades
– Cleaning set
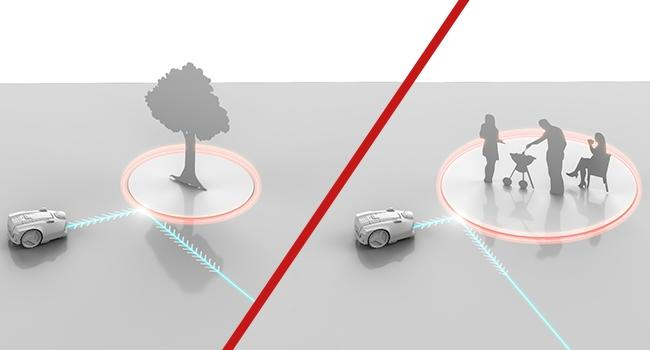
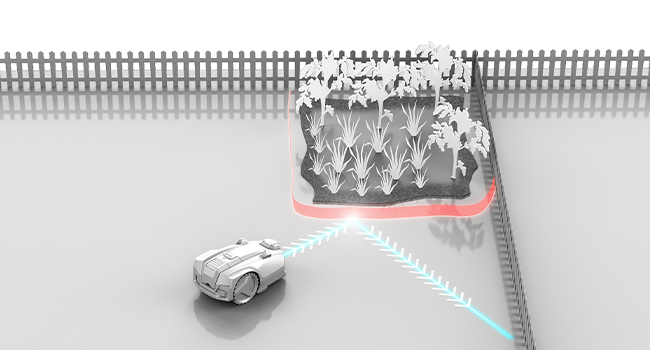
Don't want the bee-friendly flower meadow in one part of your garden to be mowed? No problem! For this purpose, the FREELEXO CAM model includes a magnetic tape, which is also available as a separate accessory. The magnetic tape can be used to exclude certain areas of the garden from the mowing area either temporarily or for longer periods – it doesn't matter whether the tape is loosely laid on the surface, buried or covered by grass growth. Thanks to its magnetic sensors, the robot can detect the tape and automatically turn away when it reaches the marked line. Whether you want to protect a flower meadow, young plants or freshly planted hedges, or you don't want the robot mower to disturb your garden party, the magnetic tape is the perfect solution. By the way, the magnetic tape can also help if certain edges of your lawn are not clearly defined.
Assembly and installation in next to no time
The perfect lawn, step by step
Step 1:
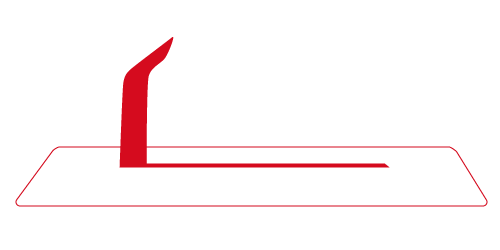
Install charging station and guide cable*
* This is a 5 m² loop of cable around the charging station for the robot mower to use when docking with the station.
Step 2:
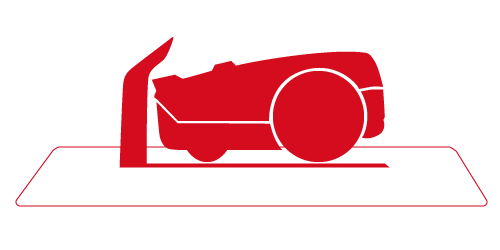
Calibration and Initialisation
Place your FREELEXO CAM in the charging station, calibrate it and start the initialisation run.

Step 3:
Start your FREELEXO CAM
Your FREELEXO CAM robot mower will be ready for use and good to go in no time at all.
Services for your robot lawn mower
3-year Einhell product warranty
Our complimentary additional service especially for you Register your new Einhell product within the first 30 days of purchase and benefit from the extended warranty. After registration, the robot lawn mower's warranty is extended by an additional year, to a total of 3 years. 3-2-1 and off we go: Find the serial number on your Einhell product and start the registration process!
Spare Parts Service
Sustainable, reliable, and the perfect match: Our subsidiary iSC GmbH supplies you and your Einhell products with any spare part you could think of. Even once the statutory warranty period has elapsed, you can be sure that your Einhell products will be professionally maintained and repaired with original components should they become damaged or worn.
Repair Service
As a 100% subsidiary of Einhell, iSC GmbH not only offers high-quality original spare parts, but also exemplifies the outstanding service from Einhell: Specialist repair technicians in our in-house workshop take care of each individual repair case to ensure that your robot mower is quickly back in working order and fully operational again.
Do you have questions about installing your robot mower or our services?
We answer the most frequently asked questions
No, the FREELEXO cam does not require a boundary wire. The lawn edges and obstacles are detected by means of the integrated camera and ultrasonic sensors.
Only a single guide cable needs to be laid during installation. This is a 5 m² loop of cable that is laid around the charging station for the robot mower to use when docking with the station.
The Einhell robot mower can also operate in the rain, but this may cause unnecessary damage to the grass and soil. The rain sensor is an optional feature that prevents this by automatically sending the robot back to the charging station.
The robot mower makes 57 dB(A) of noise during operation. This is about the same volume as a normal conversation.
In addition to its deep-drawn apron, the FREELEXO robot mower has impact, tilt and lift sensors, allowing it to detect obstacles early and autonomously and stop the blades if necessary.
No, our current FREELEXO CAM models are not compatible with the Einhell App.
The first time the robot mower is started, it performs an initialisation run, which it uses to assess the quality of the lawn boundary. This process involves determining reference values for 200 points on the boundary of the garden (if necessary, and in the case of poorly defined boundaries, a further 200 points will be recorded) before starting to mow. This can take about an hour, depending on the shape of the garden and the size of the lawn. If the robot mower docks with the charging station during the initialisation run, e.g. because of a low battery or the user gives a command to return, the robot mower will resume the initialisation run the next time it is started. Once the initialisation run is complete, the robot mower will switch on the cutting mechanism and starts mowing the lawn.
Yellow or brown patches in the mowing area can sometimes cause the robot mower to stop because it does not recognise these as grass. In these cases, the camera module checks the lawn again and then decides whether it can continue in this direction or if it should make a turn. A similar effect can occur in autumn due to leaves. To ensure smooth operation and good mowing performance, it is important to remove these from the area to be mowed.
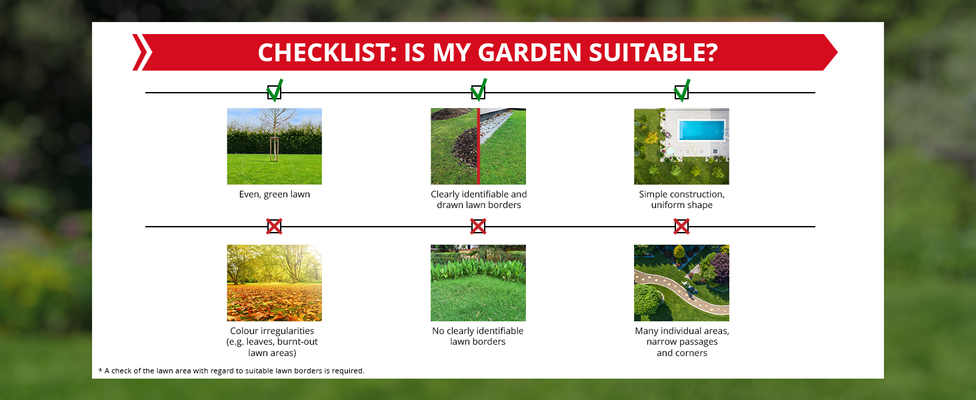
Check the ultrasonic sensors and the camera unit for dirt. If necessary, use the magnetic tape to provide supplementary marking of the mowing area or certain obstacles.
The robot mower detects leaves and branches as obstacles when its visibility is restricted or as soon as is it can no longer see the grass below. The area to be mowed should therefore always be free of leaves or branches. Scorched or discoloured patches (yellow, brown) can also cause problems for the mower, because it uses the green colour for navigation.
If adjacent green areas such as flower beds, flower meadows and low shrubs are not delimited by edging stones or fences, the robot mower may perceive them as part of the mowing area. If the border between such surfaces is insufficient or too narrow, a boundary should be marked there using the magnetic tape supplied.
Clearly recognisable lawn edges can be visible boundaries of at least 30 cm, such as edging stones, tarmac, bark mulch and gravel.
The magnetic tape serves as a virtual fence. The built-in magnetic sensors of the FREELEXO CAM detect the magnetic tape so it changes direction when it reaches the line. This allows you to exclude areas that it should not enter.
You can use magnetic tape, which is available as an accessory in 10 and 20 m lengths, to mark inadequate or difficult to detect lawn edges in order to optimally delimit the area of your garden to be mown.
Yes, this is not a problem, but a separate guide loop must be installed.
- An outdoor socket is required which provides permanent power. The power cable on the charging station is 10 m long. Be careful not to lay the power cable in the mowing area.
- The charging station must be laid on a level surface.
- It must be possible to lay the guide cable around the charging station.
- Place the charging station in a shady place.
Model A
Valid for the following units:
Without display - article numbers: 3413940; 3413941; 3413942; 3413943; 3413944; 3413945; 3413946; 3413947; 3413948; 3413949; 4326363
With display - article numbers: 3413950; 3413951; 3413953; 3413955; 3413952; 4326368
You can request a new pin if you lose it. Please follow these steps.
Have the receipt and the robotic lawnmower's serial number ready. You will need this to get your PIN! You will also need a USB stick with no data on it.
- Connect a USB stick to the USB port as shown in the picture.
- Switch on the main switch (ON).
- Press the POWER button and the "OK" button at the same time and hold them down briefly. The robotic lawnmower now starts in boot mode.
- Press the 1 button (or "Set Work Time") on the numeric keypad.
- Pull out the USB flash drive. Read out the data on the USB stick on a computer. A text file (*.txt) has been created by the robotic lawnmower. This file contains a PUK, a personal code. Contact Customer Services to obtain your PIN.
Model B
Valid for the following units:
Without display - article numbers: 3413961; 3413962
With display - article numbers: 3413980; 3413981
You can request a new PIN if you lose it. Please follow the steps below.
Have the receipt and the robotic lawnmower's serial number ready. You will need these to obtain your PIN!
- Connect a blank USB stick to the USB port (on the underside of the unit).
- Turn on the main switch (ON).
- The robotic lawnmower automatically saves the PUK on the USB flash drive and ends the process with a whistling sound.
- Remove the USB stick. 4. Read out the data on the USB flash drive on a computer. A text file (*.txt) has been created by the robotic lawnmower. This file contains a PUK, a personal code. Contact Customer Service to obtain your PIN.
For model B with a display, you also have the following option for obtaining the mower's PUK:
You can request a new PIN if you lose it. Please follow the steps below.
Have the receipt and the robotic lawnmower's serial number ready. You will need these to get your PIN!
- Press the SET button for 6 seconds in locked status.
- The PUK is now shown in the display.
- Contact customer service to obtain your PIN.


